Have you ever wanted to use your own custom sizes for WordPress images? By default, WordPress has predetermined image sizes, so when you upload an image it creates additional files for these default sizes. However, having your own custom image sizes can save you hours editing your photos outside WordPress. In this tutorial, we will share how to add custom image sizes in WordPress.
Note: This tutorial is advanced and will require you to edit the code of your WordPress theme. Additionally, this is an enhanced version of the add_image_size() function in WordPress.
To add custom image sizes in WordPress, you’ll need to follow these 4 steps:
To add your custom image sizes to WordPress you must first edit your theme’s functions.php file by ensuring your theme supports custom theme images and then defining your custom image sizes and then registering them to the WordPress core.
The fastest way to add theme support for post thumbnails is by going to Appearance » Editor and edit the functions.php file of your theme. Be sure to back up your website, or make a copy of this file first. Next paste this script in that file:
add_theme_support( 'post-thumbnails' );
The first function you will need to add will define your custom image sizes in a large array. This is based on the add_image_size() function and allows you to keep all of your custom image sizes defined in a singular place. The parameters are defined by the following:
/**
 * @desc Define custom image sizes
 * @var array
*/
$custom_image_sizes = array(
	array('Gallery Thumbnail', 'gallery-thumbnail', 475, 475, true),
    array('Portfolio Image', 'portfolio-image', 1000, 600, true),
);
Secondly, we will loop through the array you previously created using the function below and register the image size using the add_image_size() function. Be sure to call the function at the end, otherwise, the function will not run.
/**
 * @desc Register custom image sizes to WordPress
*/
function register_custom_image_sizes()
{
	global $custom_image_sizes;

	if (!empty($custom_image_sizes)){

		foreach ($custom_image_sizes as $custom_image_size){

			add_image_size( $custom_image_size[1], $custom_image_size[2], $custom_image_size[3], $custom_image_size[4] );

		}

	}

}

register_custom_image_sizes();
Next add the below to your functions.php file below the items outlined in Step 1. This function will take the image sizes and use the array_merge function to add your new image sizes to the WordPress default array of image sizes. Similarly, be sure to add the add_filter at the end, otherwise, the function will not run.
/**
 * @desc Add custom image sizes to WP Admin
 * @return array
*/
function add_custom_image_sizes($sizes)
{

	global $custom_image_sizes;

	$addsizes = array();

	if (!empty($custom_image_sizes)){

		foreach ($custom_image_sizes as $key => $value){

			$addsizes[$value[1]] = $value[0];

		}

	}

	return array_merge( $sizes, $addsizes);

}

add_filter( 'image_size_names_choose', 'add_custom_image_sizes' );
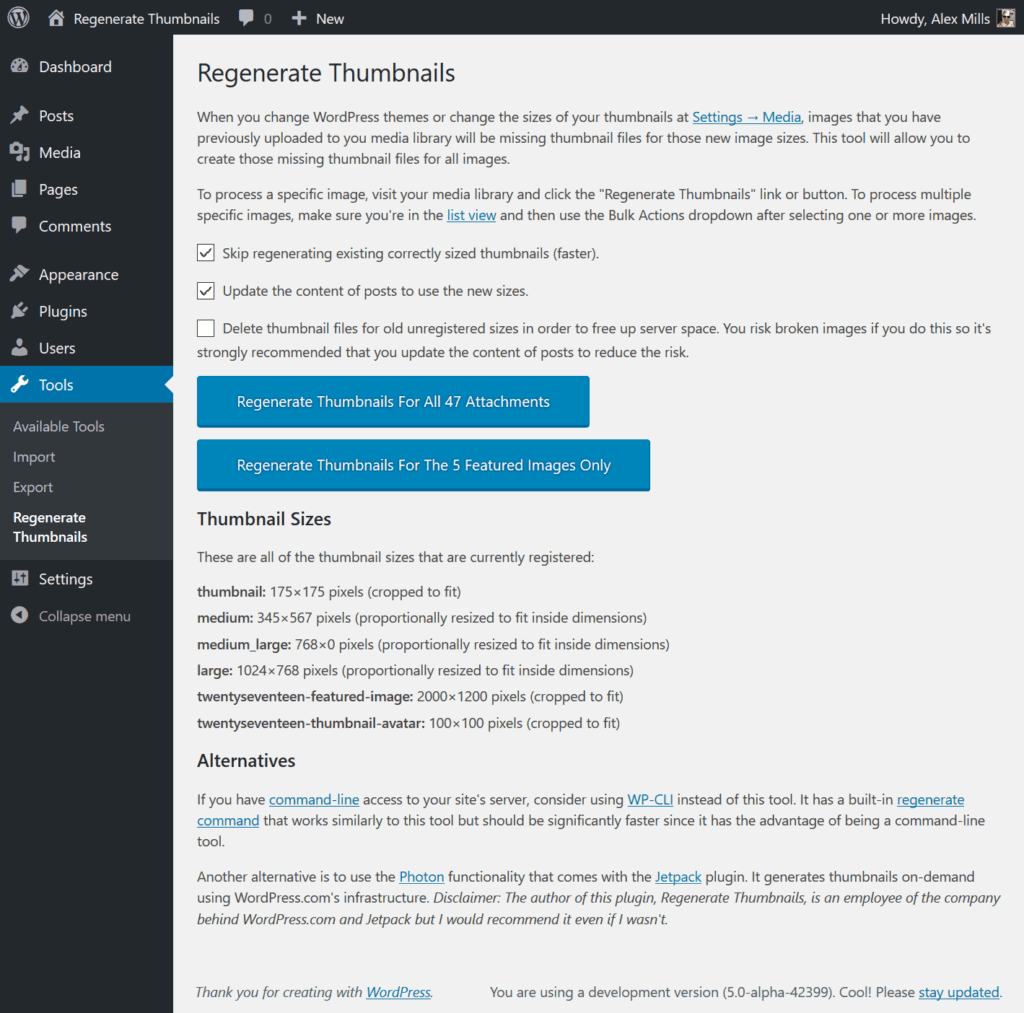
Next you will need to regenerate thumbnails in WordPress so that all of your previously uploaded images will be updated with the new image sizes.

We recommend you use the Regenerate Thumbnails plugin. It will update your WordPress images to the custom sizes you added in the previous steps.
Install and activate the plugin. After activating the plugin, you need to go to Tools > Regen. Thumbnails and hit the Regenerate All Thumbnails button. This step may take some time depending on how many images you have previously uploaded to the WordPress Media Library.

Finally, there are 2 methods to use your newly created image sizes. First, you can add the following code in the theme file inside the post loop where you want to show your image. Be sure to use the slug (second item in the array).
<?php the_post_thumbnail( 'your-new-image-size' ); ?>
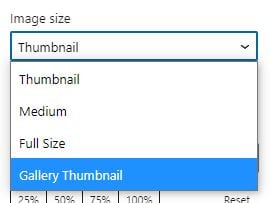
Additionally, you can select the image size when adding an image in the WordPress editor when creating or editing a Post/Page.

We hope this tutorial has helped you to add custom image sizes to your WordPress installation. There are many benefits to creating custom image sizes, but don’t overdo it; remember that each image size you create is another image that needs to be regenerated and stored and take up space on your server.
Last updated on by Joshua Holdeman
